What is the effect of “time” on the work?
The effect of time on artworks like Christo and Jeanne Claude’s is that their artworks are there only for a temporary amount of time, but through the time they are given, it gives them the insight of what they are trying to look at when the artwork is officially finished. Since most of the artworks they create are placed on environments in which someone else owns.
does the temporary nature of the work make it more important?
I believe that the fact that their artworks are only temporary that it makes the artworks more important, as it shows that it gives people around them a temporary amount of time to evaluate and see the artworks, as it is not there forever.
what happens after it is removed? How do we know it existed?
When the artworks that are temporarily created and are removed over a period of time, it is only remembered through images or films taken by the photographers.
what challenges do site specific/ installation artists face?
The fact that it is in different peoples environment so it may be difficult for them to find areas to find to create their artworks.
STEP 1: THE BRIEF
In your groups you are to create a Wrapped sculpture.
You are to adopt the artmaking practice of CHRISTO AND JEANNE-CLAUDE to create your sculpture. The following rules apply:
STEP 2: RESEARCH
In your groups you are to create a Wrapped sculpture.
You are to adopt the artmaking practice of CHRISTO AND JEANNE-CLAUDE to create your sculpture. The following rules apply:
- You must choose a SITE/ OBJECT that is available within the school environment
- You may use materials of your choice for example; paper, fabric, toilet paper, masking tape, string etc.
- Some materials will be made available, however, you may also need to source some materials yourself.
- You cannot make a permanent mark on the environment. All components of your sculpture must be deconstructed and the site left exactly as it was prior to the creation of your sculpture.
STEP 2: RESEARCH
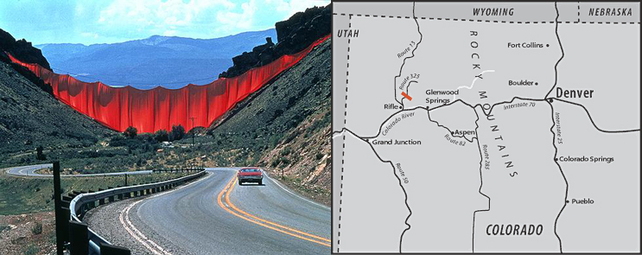
- title: Valley Curtain
date: 1970-1972 (although photograph was taken in 1972)
materials: aluminium panel (149.8 x 198.1)
concept/theme: the concept of this artwork, is to be visible, Christo and Jeanne-Claude’s artworks are always appealing to see and always visible and easy to catch people attention. With the use of the red barrier, it creates a more eye-catching effect.
explain: The sculpture itself put into this siting, is great because it widely visible for whoever is driving through this main road are able to draw their attention to the humongous red cloth.
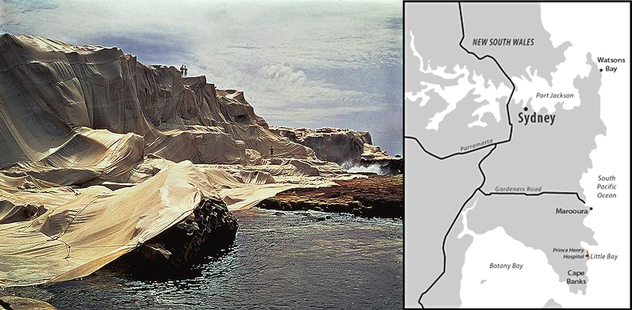
title: wrapped coast
date: 1968-1969 (photograph was taken in 1969)
materials: aluminium panel (59 x 79)
concept/theme: the theme and concept of this artwork is to show that covering up a certain area may not change the way it looks because of the shapes that is already naturally made into place, like the rocks in this photograph, it may just show a different perspective of what it may look like but they shapes and bumps will always be similar.
explain: this artwork is well made into the site as it gives the illusion that the certain is sited into a different area, different but similar.
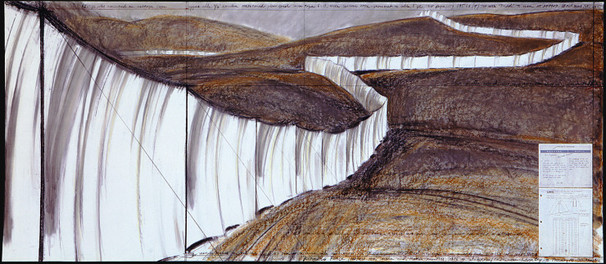
title: Running fence
date: 1976, which was then left up until the year of 2005
materials: two sheets of technical data, pastel, charcoal, wax crayon, and graphite on move paper overall (106.4 x 243.4cm)
concept/theme: The theme and concept of this artwork, is quite similar to the great wall of china, but instead created by sheets.
The space used for the artwork is great, as it has the wide space which could let the artwork extend for on and on.
STEP 3: IDEAS
(1) three different design concepts
1. design one involved wrapping a tree with multiple coloured wool.
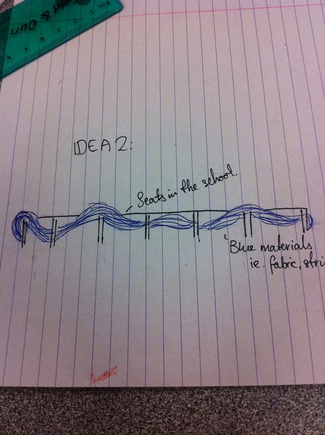
2. design two involved weaving and wrapping the seats at the front of the school with different shades of blue fabric material.
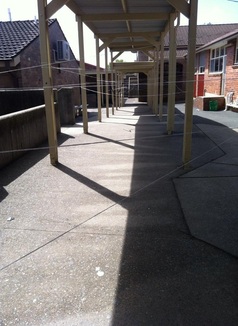
3. design three was the final design in which we stuck with, which involved wrapping poles in a different heights, such as a spider web wrapped around.
(2) sketched design concepts idea 1 & 2.
(1) three different design concepts
1. design one involved wrapping a tree with multiple coloured wool.
2. design two involved weaving and wrapping the seats at the front of the school with different shades of blue fabric material.
3. design three was the final design in which we stuck with, which involved wrapping poles in a different heights, such as a spider web wrapped around.
(2) sketched design concepts idea 1 & 2.

|
|
(3) name of designs:
1. rainbow wrap around
2. circular waves
3. intwining strings
FINAL DESIGN
Materials used for final design: string, sticky tape, fabric.
this final idea was finalised as it was, less time consuming than our other ideas, and needed less materials as it was the easiest choice to go through with.
1. rainbow wrap around
2. circular waves
3. intwining strings
FINAL DESIGN
Materials used for final design: string, sticky tape, fabric.
this final idea was finalised as it was, less time consuming than our other ideas, and needed less materials as it was the easiest choice to go through with.
STEP 5: PLANNING AND PRODUCTION
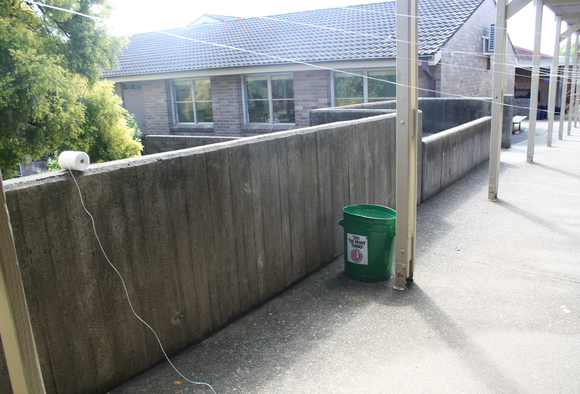
- Photograph the site you will be working with. ^
- List the tools, materials and resources you will need in order to create your sculpture.
Scissors, sticky tape, string and ribbon
- Explain how your sculpture explores a theme similar to that of Christo and Jeanne-Claude.
- Describe how your sculpture transforms the original site and provokes a change in thought about the original site.
- List the steps your group will follow to create the sculpture within the 1-hour lesson provided.
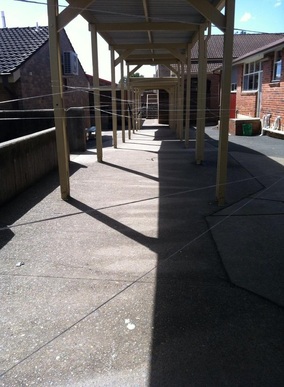
2. Move up to another pole and wrap the string around, going in a zig zag or crisscross direction
3. Sticky tape the string to the pole so it is secure
4. Throw the end of the string over the edge
- State how you intend to document your sculpture- during the physical making stages, the finished product and the deconstruction of your sculpture. How do you intend to present your documentation?
STEP 5: MAKING
STEP
6: ICT/ DOCUMENTATION
|
|
STEP 7: EVALUATION
Evaluation of our Wrapped Sculpture
Evaluation of our Wrapped Sculpture
The Sculpture.
1. In our wrapped sculpture we used the following materials…
String, fabric, sticky tape was used in the process to complete our artwork.
2. We chose to use these materials because they symbolise the following ideas in the following ways…
The string was used to help convey the up's and down's of an individual, as the strings are put on the area going up and down the poles which help the meaning.
3. We attached these materials together using…
sticky tape was used to attach these materials
4. We chose to use the site we did because…
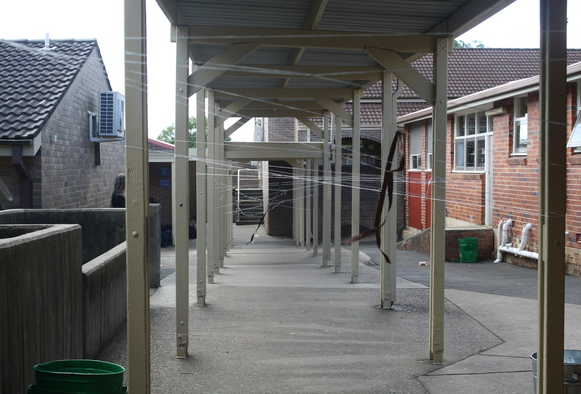
I thought it would be an interesting area to focus on and many people go through this area, and by putting it through this area many different students and staff are able to interact with the artwork.
5. This site enhanced our ideas because…
the poles were the main point of the chosen site as it helped us with our meaning of the artwork.
6. In our design we transformed the original site in the following ways…
we added fabric to help the artwork become more visible.
7. Changing the site in this way aimed to provoke the following changes in thought…
8. Our final sculpture changed from our original design concept in the following ways…
we were suppose to go with design 2, but then when we decided that design 3 would be easier we weren't through with it.
9. What areas of the sculpture do you think work the best? Why?
the strings that were wrapped around the pole were the best part of the artwork, as it worked the way we wanted them to end up like.
10. If you had the opportunity to create the sculpture again, what areas of the sculpture would you attempt to improve? Why?
i would improve the visibility of the strings, as it may have been a hazard if people were unable to see the white string wrapped around the poles.
11. How do you think you could go around improving these features?
using different coloured string, such as using the colour red.
Documentation.
12. How do your photographs (and video) enhance the ideas you were exploring in your sculpture?
the angles of the photographs taken, help see the concept of the artwork as you can see right through it, easily.
13. In what ways could these be improved?
we could have done close ups of the string, as the photographs were mainly backed up, so it may be difficult to see the string in the photographs during the documentation part of this process.
Working collaboratively.
14. What were the challenges of working in a team?
not everyone engaged in the work, during the actual art making in the period, only half the group were present and the other half was away, which made it difficult for the process.
15. How could these be addressed (and eliminated) in the future?
you can't really, because you don't know who you can rely on, whilst doing this art making.
16. What were the positives of working in a team?
we had many different ideas put together, which resulted in our designs of 1,2 and 3.
17. What strategies did you find helped promote positive working relationships and productivity when working collaboratively?
communication towards one another helped promote positive working relationships and productivity with one another.
18. How did you approach to this collaborative task change from your last task?
i believe that the last task was more collaborative, and easier to wo
19. How would you approach a collaborative task in the future?
The Sculpture.
1. In our wrapped sculpture we used the following materials…
String, fabric, sticky tape was used in the process to complete our artwork.
2. We chose to use these materials because they symbolise the following ideas in the following ways…
The string was used to help convey the up's and down's of an individual, as the strings are put on the area going up and down the poles which help the meaning.
3. We attached these materials together using…
sticky tape was used to attach these materials
4. We chose to use the site we did because…
I thought it would be an interesting area to focus on and many people go through this area, and by putting it through this area many different students and staff are able to interact with the artwork.
5. This site enhanced our ideas because…
the poles were the main point of the chosen site as it helped us with our meaning of the artwork.
6. In our design we transformed the original site in the following ways…
we added fabric to help the artwork become more visible.
7. Changing the site in this way aimed to provoke the following changes in thought…
8. Our final sculpture changed from our original design concept in the following ways…
we were suppose to go with design 2, but then when we decided that design 3 would be easier we weren't through with it.
9. What areas of the sculpture do you think work the best? Why?
the strings that were wrapped around the pole were the best part of the artwork, as it worked the way we wanted them to end up like.
10. If you had the opportunity to create the sculpture again, what areas of the sculpture would you attempt to improve? Why?
i would improve the visibility of the strings, as it may have been a hazard if people were unable to see the white string wrapped around the poles.
11. How do you think you could go around improving these features?
using different coloured string, such as using the colour red.
Documentation.
12. How do your photographs (and video) enhance the ideas you were exploring in your sculpture?
the angles of the photographs taken, help see the concept of the artwork as you can see right through it, easily.
13. In what ways could these be improved?
we could have done close ups of the string, as the photographs were mainly backed up, so it may be difficult to see the string in the photographs during the documentation part of this process.
Working collaboratively.
14. What were the challenges of working in a team?
not everyone engaged in the work, during the actual art making in the period, only half the group were present and the other half was away, which made it difficult for the process.
15. How could these be addressed (and eliminated) in the future?
you can't really, because you don't know who you can rely on, whilst doing this art making.
16. What were the positives of working in a team?
we had many different ideas put together, which resulted in our designs of 1,2 and 3.
17. What strategies did you find helped promote positive working relationships and productivity when working collaboratively?
communication towards one another helped promote positive working relationships and productivity with one another.
18. How did you approach to this collaborative task change from your last task?
i believe that the last task was more collaborative, and easier to wo
19. How would you approach a collaborative task in the future?
